Spring Bootでログイン画面を作る
こんちか!!たくみんです!!最近、会社でSpring Frameworkを使っているので「Spring Bootの勉強してみっか!」ということで勉強しています。そして簡単なログイン画面の実装に4時間を費やしたので備忘録としてこの記事を書きます。
目次
- 目次
- Spring Security
- ログイン画面
- LoginControllerクラス
- Employeeクラス(Entitiy)
- EmployeeRepositoryクラス
- LoginServiceクラス
- WebSecurityConfigクラス
- デモ
- まとめ
- 参考にしたサイト
Spring Security
ログイン画面
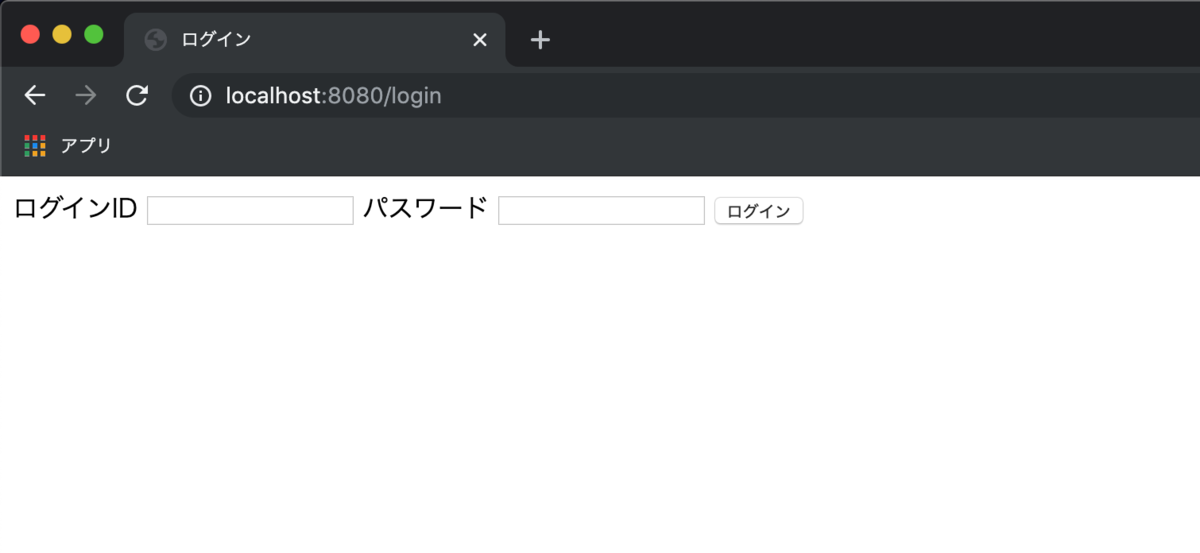
ログイン画面です。ただログインIDとパスワードを入力するだけの画面です。

<!DOCTYPE html>
<html xmlns:th="http://www.thymeleaf.org">
<head>
    <meta charset="UTF-8">
    <title>Title</title>
</head>
<body>
<form th:method="POST" th:action="@{/login}">
    <label for="loginId">ログインID</label>
    <input type="text" name="loginId" />
    <label for="passWord">パスワード</label>
    <input type="password" name="passWord" />

    <input type="submit" value="ログイン" />
</form>
</body>
</html>
LoginControllerクラス
ログイン画面のControllerクラスです。このContollerでは/loginのGETリクエストに対して、ログイン画面を表示するようにしているだけです。
package com.example.demo.app.controller;

import org.springframework.stereotype.Controller;
import org.springframework.web.bind.annotation.GetMapping;
import org.springframework.web.bind.annotation.RequestMapping;
import org.springframework.web.servlet.ModelAndView;

@Controller
@RequestMapping("login")
public class LoginController {

    @GetMapping
    public ModelAndView index(ModelAndView modelAndView) {
        modelAndView.setViewName("/login/index");

        return modelAndView;
    }
}
Employeeクラス(Entitiy)
今回は従業員管理システムという想定でログイン画面を作りました。このEmployeeクラスは、ユーザ情報を管理するクラスだと思ってください。Dataアノテーションを使うことで、煩わしいgetterとsetterを省略することができます。めちゃんこ便利ですね。もっと驚いたのは、Spring JPAによってこのクラスの構成と同じテーブルが自動的にDBに生成されることです。また、このクラスをログイン処理に使用するためにSpring Securityで提供されているUserDetailsインターフェースを実装しています。
package com.example.demo.domain.entitiy;

import lombok.Data;
import org.springframework.security.core.GrantedAuthority;
import org.springframework.security.core.userdetails.UserDetails;

import javax.persistence.*;
import java.util.Collection;
import java.util.Date;

@Entity
@Data
public class Employee implements UserDetails {

    @Id
    @GeneratedValue(strategy = GenerationType.IDENTITY)
    private Long Id;
    private String loginId;
    private String passWord;
    private String name;
    private int age;
    private String department;
    private Date createdAt;
    private Date updatedAt;

    @Override
    public Collection<? extends GrantedAuthority> getAuthorities() {
        return null;
    }

    @Override
    public String getPassword() {
        return this.passWord;
    }

    @Override
    public String getUsername() {
        return this.loginId;
    }

    @Override
    public boolean isAccountNonExpired() {
        return true;
    }

    @Override
    public boolean isAccountNonLocked() {
        return true;
    }

    @Override
    public boolean isCredentialsNonExpired() {
        return true;
    }

    @Override
    public boolean isEnabled() {
        return true;
    }
}
EmployeeRepositoryクラス
Employeeクラスに対応するRepositoryです。今回は、loginIdを使用してログインを行うため、findByLoginId()を追加しています。
package com.example.demo.domain.repository;

import com.example.demo.domain.entitiy.Employee;
import org.springframework.data.jpa.repository.JpaRepository;

public interface EmployeeRepository extends JpaRepository<Employee, String> {

    public Employee findByLoginId(String loginId);
}
LoginServiceクラス
Login処理を行うServiceクラスです。UserDetailsSeviceクラスを実装しています。UserDetailsServiceクラスはSpring Securityで提供されているクラスであり、loadUserByUsernameメソッドを実装することでログインに使用するユーザ情報を検索します。今回は、EmployeeクラスのloginIdを用いてログインを行うため、loadUserByUsernameメソッドの中でemployeeRepository.findByLoginId(username)を実行しています。このメソッドの返り値はUserDetailsインターフェースをのため、ログインに使用したいEntitiyクラスはUserDetailsインターフェースを実装している必要があります。
package com.example.demo.domain.service;

import com.example.demo.domain.repository.EmployeeRepository;
import org.springframework.beans.factory.annotation.Autowired;
import org.springframework.security.core.userdetails.UserDetails;
import org.springframework.security.core.userdetails.UserDetailsService;
import org.springframework.security.core.userdetails.UsernameNotFoundException;
import org.springframework.stereotype.Service;

@Service
public class LoginService implements UserDetailsService {

    @Autowired
    EmployeeRepository employeeRepository;

    @Override
    public UserDetails loadUserByUsername(String username) throws UsernameNotFoundException{
       Employee employee = employeeRepository.findByLoginId(username);
       if (employee == null) {throw new UsernameNotFoundException(username); }
       return employee;
    }
}
WebSecurityConfigクラス
WebSecurityConfigurerAdapterクラスを継承しています。configure(HttpSecurity http)メソッドにより認証が必要なページと不必要なページを切り分けることができます。また、ログインに使用するページ、ログイン成功時に遷移するページ、ログアウト時の処理なども記述することができます。そして、loginProcessingUrlに指定したパスにリクエストが送られるとconfigure(AuthenticationManagerBuilder auth)メソッドが実行され、指定したUserDetailsServiceによりユーザ認証が行われます。
package com.example.demo.config;

import com.example.demo.domain.service.LoginService;
import org.springframework.beans.factory.annotation.Autowired;
import org.springframework.context.annotation.Bean;
import org.springframework.context.annotation.Configuration;
import org.springframework.security.config.annotation.authentication.builders.AuthenticationManagerBuilder;
import org.springframework.security.config.annotation.web.builders.HttpSecurity;
import org.springframework.security.config.annotation.web.configuration.EnableWebSecurity;
import org.springframework.security.config.annotation.web.configuration.WebSecurityConfigurerAdapter;
import org.springframework.security.crypto.bcrypt.BCryptPasswordEncoder;
import org.springframework.security.crypto.password.PasswordEncoder;

@Configuration
@EnableWebSecurity
public class WebSecurityConfig extends WebSecurityConfigurerAdapter {

    @Autowired
    LoginService loginService;

    /**
     * パスワードをハッシュ化するため
     * @return
     */
    @Bean
    public PasswordEncoder passwordEncoder() {
        BCryptPasswordEncoder bCryptPasswordEncoder = new BCryptPasswordEncoder();

        return bCryptPasswordEncoder;
    }

    @Override
    public void configure(HttpSecurity http) throws Exception{

        // ログインページ以外は認証が必要
       http.authorizeRequests()
               .anyRequest().authenticated()
               .and()
               .formLogin()
               .loginPage("/login")  //ログインに使用するページ
               .loginProcessingUrl("/login")  //ログイン処理を開始するURL
               .usernameParameter("loginId") //ログイン処理に使用するパラメータ
               .passwordParameter("passWord") //ログイン処理に使用するパラメータ
               .defaultSuccessUrl("/emp") // ログイン成功時に遷移するURL
               .failureUrl("/login?error") //ログイン失敗時に遷移するURL
               .permitAll();

    }
    @Autowired
    public void configure(AuthenticationManagerBuilder auth) throws Exception {
      auth.userDetailsService(loginService).passwordEncoder(passwordEncoder());
    }
}
デモ
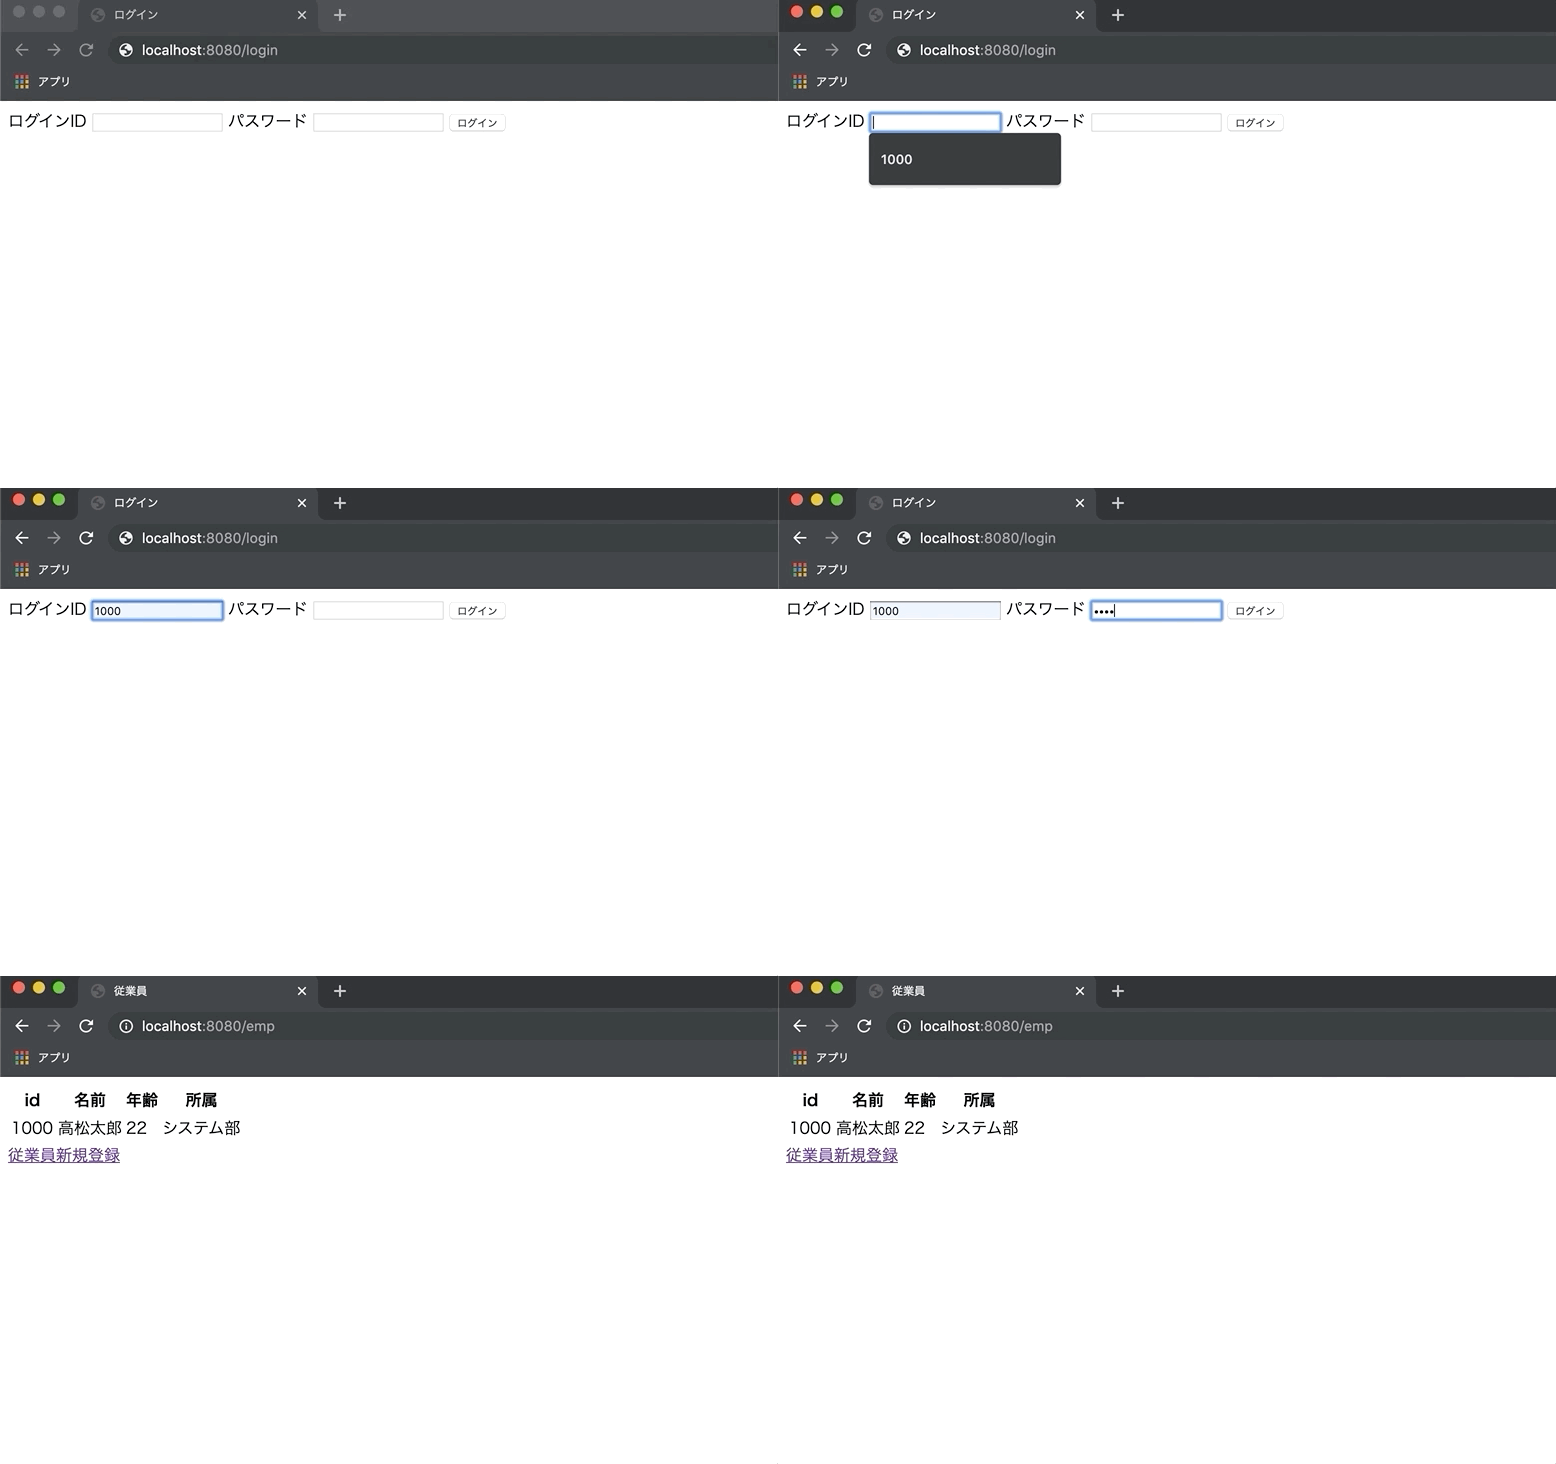
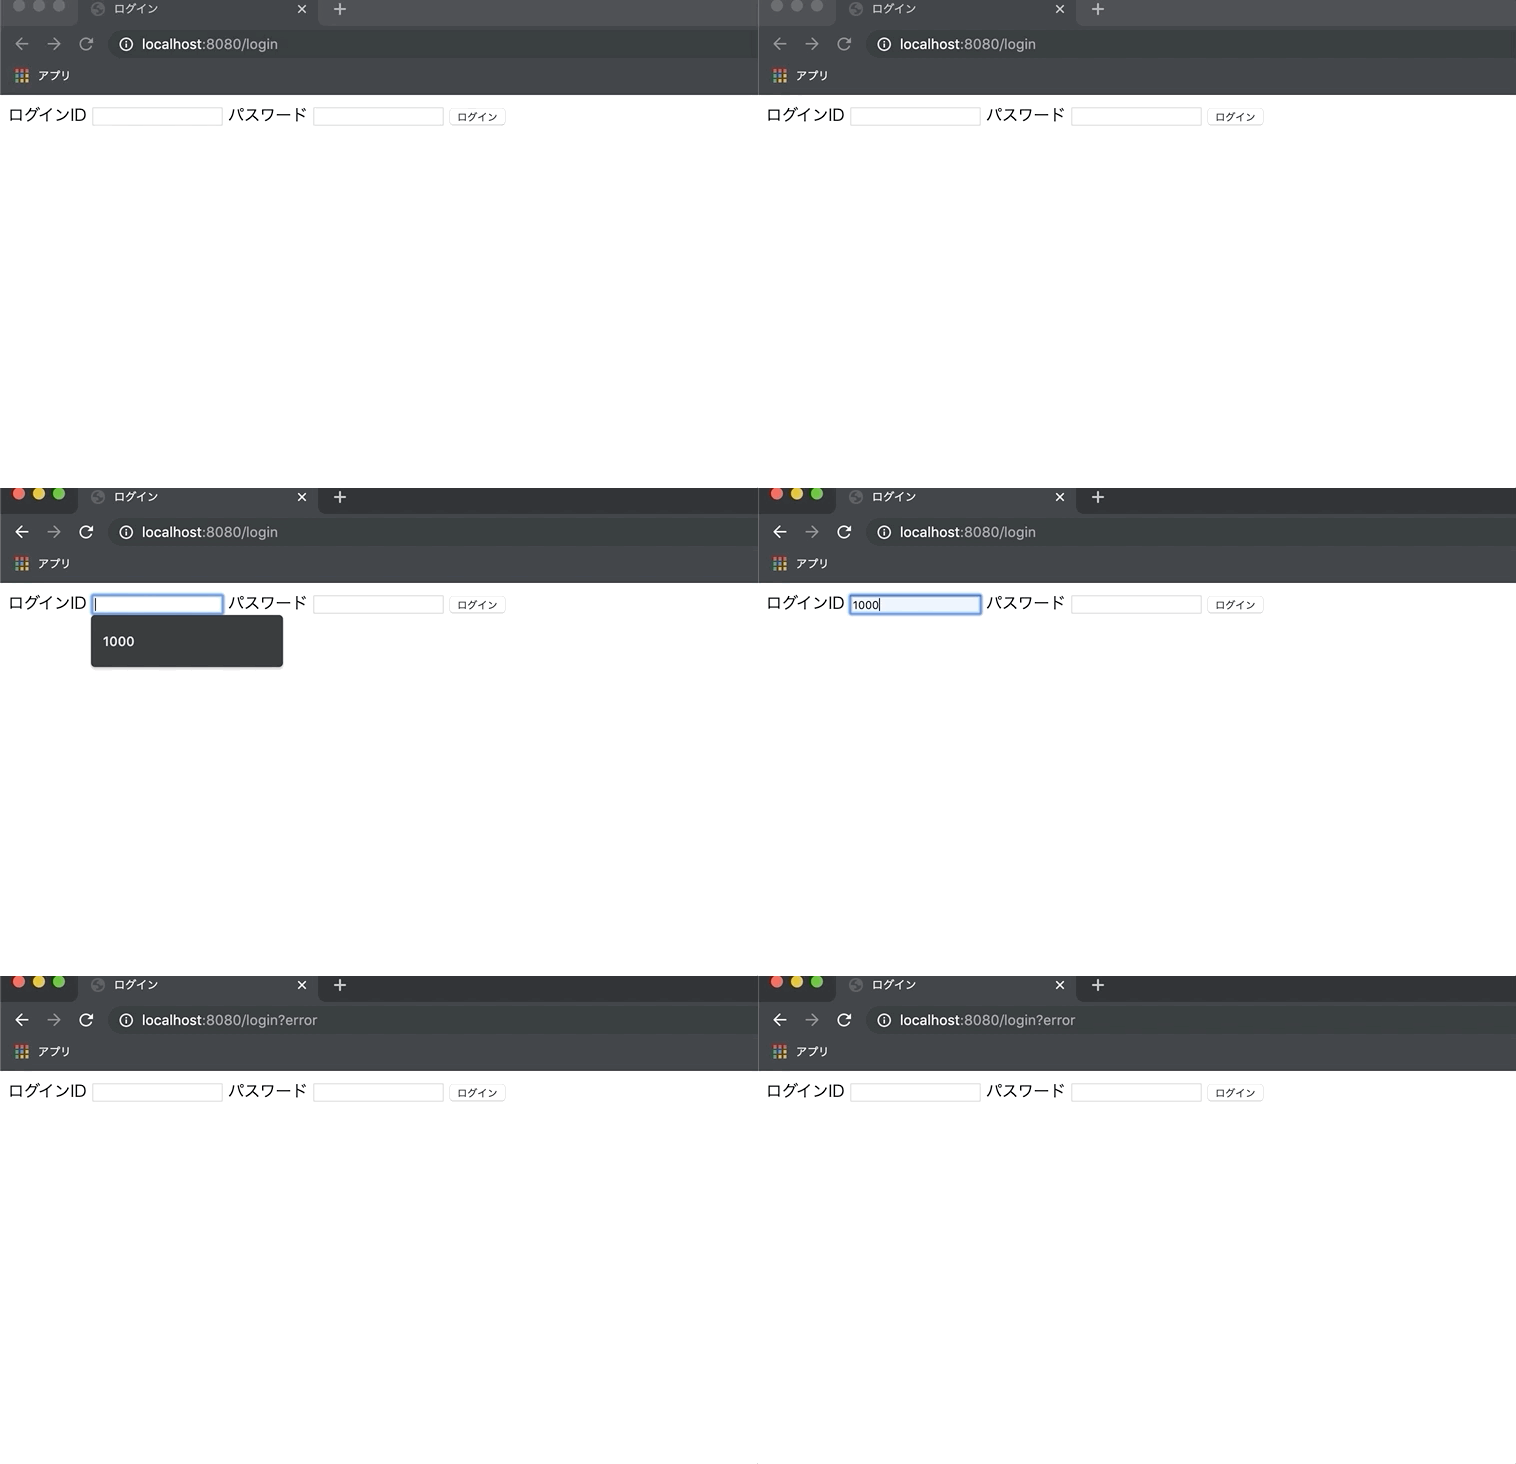
実際にログインをしてみます。LoginID 1000、パスワード 12345の従業員をあらかじめ作成しておきました。
ログイン成功時

ログイン失敗時

WebSecurityConfigクラスで記述した通り、ログインに成功すると/empに遷移し、失敗すると/login?errorとなっていることがわかります。
まとめ
Spring Securityの方でインターフェースが用意されているので、それらを実装するだけでログイン処理を作成することができるのはとても便利だと思います。仕事ではSpring Frameworkを使うことになるのでこれからは積極的にSprinig Bootで開発していけたらと思います。また、TERASOLUNAをオススメされているのでそっちの方も勉強していきたいです。ではでは。